HOW TO IMPORT POINTS IN AUTOCAD CIVIL 3D IN LAYERS AND CREATE A CONTOUR MAP
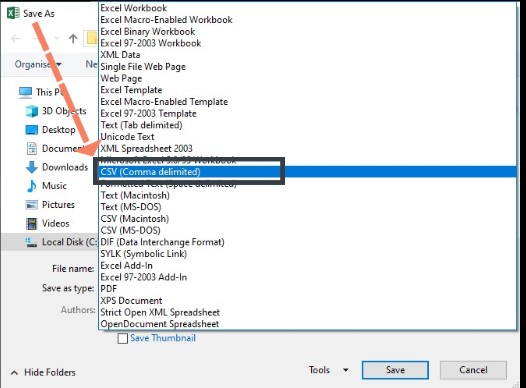
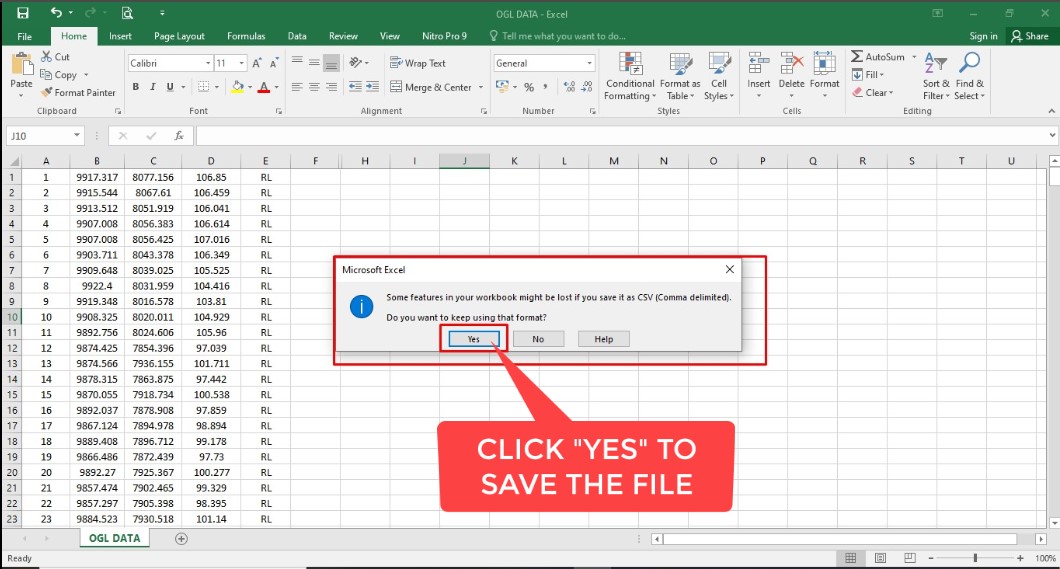
We can very easily able to create a contour map by importing topographical survey points in AutoCAD Civil 3D. So, here we are going to see how to import points in AutoCAD CIVIL3D in layers and create a contour map. So, first of all, we need to create a .csv file in excel to import points in Civil 3D. Now follow the below steps to create a .csv file in excel---
- STEP-1
Now the .csv (Comma Separated Values) file has been saved.
Now We need to go to AutoCAD Civil 3D software for importing the points data. After importing all points we need to do these steps-
1. Create a Point Group.
In Tool space, on the Prospector tab, right-click the Point Groups.
Click New.
2. Create a TIN surface.
Click Home tab ➤ Surfaces
drop-down ➤ Create Surface
In the Create Surface dialog box, for Type, select TIN surface.
In the Properties table, specify the following parameters:
Name: EG
Description: Existing Ground surface from imported point data
Style: Chose anyone from the drop-down list.
Render Material: Choose anyone.
Click OK
3. Add the point group to the surface.
Go to the Tool Space tab➤
Click on the surface drop-down list ➤ Right-click on the points group➤
Click on the Add. ➤Select your required points group ➤ Click on apply
Now the Contour Map has been generated.
At the command line, enter ZE.
The surface, which contains the imported point data, is displayed in the drawing.
Now, watch the video file which is attached below. You will find all the steps as written above.----


0 Comments
Please do not enter any spam link in the comment box